
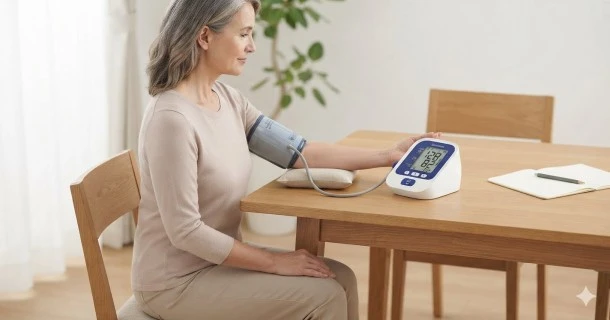
Master your digital upper arm blood pressure monitor. Learn step-by-step cuff positioning, why the left arm is preferred, and how to avoid mistakes for accurate clinical readings.
Mastering Your Upper Arm Blood Pressure Monitor: A Step-by-Step Accuracy Guide
A digital upper arm blood pressure monitor is the gold standard for tracking cardiovascular health at home. These devices utilize advanced electronic sensors to measure pulse rate and blood pressure swiftly and non-invasively. However, achieving clinical accuracy relies heavily on proper usage, correct cuff placement, and consistent posture.
Understanding Your Monitor's Components
An automatic home arm monitor consists of two primary integrated components:
- The Main Electronic Unit: Features a clear digital display that calculates and presents your systolic pressure, diastolic pressure, and pulse rate (heartbeats per minute). Most modern units also feature internal memory storage to track logs for future medical review.
- The Inflatable Arm Cuff: Equipped with a built-in air tube and plug, this component wraps snugly around your upper arm to detect arterial pressure variations via the oscillometric method.
Step-by-Step Instructions: How to Fit and Position Your Arm Cuff
Incorrect cuff placement is the most common cause of false high or low readings. Follow these precise medical steps to ensure your device functions perfectly:
- Prepare the Arm: Remove any tight or restrictive clothing from your upper arm. While thin fabrics are acceptable, thick garments like sweaters must be removed to avoid compressing the brachial artery.
- Select the Proper Arm: You can technically measure on either side. However, healthcare providers generally recommend using your left arm because it sits physically closer to your heart. If your doctor instructs you to use a specific arm, follow their guidance consistently, as baseline numbers can vary slightly between your left and right arms.
- Thread the Cuff Loop: Insert your arm through the fabric cuff loop. The smooth air tube should run straight down the inside of your forearm, aligning perfectly with your middle finger.
- Height and Placement: Slide the cuff up your arm until the bottom edge sits approximately one inch (or one finger-width) above the bend of your elbow.
- Secure and Rest: Fasten the hook-and-loop fabric securely. It should fit snugly against your bare skin but not pinch. Rest your arm on a flat table or cushion so the center of the cuff rests exactly at heart level.
Activating the Automatic Inflation Measurement
Once your body posture is anchored, turn on your machine:
- Press the Start Button: The main digital unit will automatically engage its electric pump to inflate the cuff to its optimal operational pressure.
- Remain Still and Silent: The internal sensors detect minor pressure modulations of your pulse during inflation and deflation. Moving your limbs, shaking your hands, or speaking will distort these micro-vibrations and trigger error codes.
- Log Your Reading: The cuff will completely deflate once the calculation finishes. The screen will instantly display your numbers. Wait 60 seconds and take a second reading to average the data for precise tracking.
Frequently Asked Questions (FAQs)
Why should I use the left arm instead of the right arm for blood pressure?
While you can use either arm, the left arm is preferred because it is anatomically closer to the heart and the main circulatory pathway (the aorta). Minor variations between arms are normal. However, if the reading differs by more than 10 mmHg between your left and right sides, consult your doctor to determine which arm should serve as your official baseline.
What happens if the blood pressure cuff is placed too low or too high?
If the cuff is wrapped too low (below the level of your heart), gravity causes hydro-static pressure to increase, resulting in a falsely elevated reading. Conversely, positioning the cuff too high (above heart level) will result in a falsely low reading. Keeping the arm supported at mid-chest level is crucial for an accurate calculation.
Why does my home arm monitor give me a different reading every time?
Blood pressure is highly dynamic and shifts continuously based on your breathing patterns, stress levels, minor physical adjustments, or even background noise. To get a true reading, always sit quietly for 5 minutes before pressing start, and take two separate readings spaced 1 minute apart to find the average.